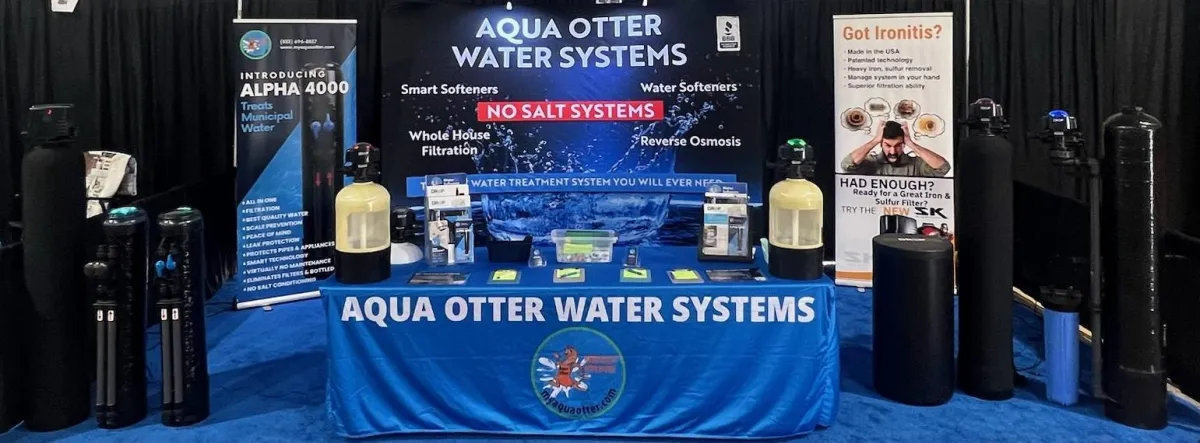
whole house water softener.png

The Difference between Salt Softener and No Salt Conditioner

If you notice stains, watermarks or filmy residue on your sinks and bathtubs, you might have a problem with hard water. Hard water contains high levels of minerals such as calcium and magnesium and can wreak havoc in any household. Luckily, there’s a great way to tackle this issue: installing a high-quality water softener in your home.

A water softener helps increase the lifespan of your plumbing and water-using appliances, and even lowers your water bill. Heck, it can even soften your skin and hair.

Bear in mind that water softeners come in two different variants: salt-based softener and salt-free Conditioners . Many people believe that the only difference is that one doesn’t use salt, but that is far from the truth.

Each system has several distinctions that one must consider before purchasing. But which one is better? To answer this question, we must take a look at how each system works, the pros and cons for each and what situation each type is best suited for.

How Salt-Based Water Softeners Work?

Salt water softener systems turn “hard” water into “soft” water through a process called ion exchange. Using the electronic metered valve mounted atop the resin tank, the system measures water by the gallon before running a cleaning cycle. Once the resin bed reaches its saturation point, the cleaning cycle begins. During the cycle, a series of back flushes purge the trapped minerals and washes them out of the system. When water flows through the resin bed inside the tank, salts like sodium and potassium chloride are exchanged with hardness-causing minerals (primarily calcium and magnesium), resulting in “soft” water. The salts are also replenished in the resin bed during the cycle and the system is ready to go again.

Salt-based softeners are designed to remove hardness-causing minerals from your water. As a result, you’ll probably notice a little to no limescale buildup on fixtures and appliances in your home. You’ll also see your clothes appearing brighter and cleaner and your hair and skin no longer feeling dry and itchy. Other long-term benefits include more efficient and longer-lasting appliances as well as fewer repairs and plumbing maintenance.

Salt-based softeners are effective in softening your water and should be used if your hard water levels are considerably high.

What Maintenance is Involved In Salt Based Water Softeners?

Blocks of salt for the softener water.

The only maintenance involved with a salt softener is setting up the initial timing parameters for regeneration and the monthly refilling of salt. Other than that you’ll want to keep an eye on making sure the brine tank doesn’t create a salt bridge. A salt bridge occurs when a hard crust in the brine tank forms and creates a space between the water and the salt. To prevent this, you’ll want to take the end of a broom stick or handle and break it up. Salt mush is another more serious issue where dissolved salt recrystallizes and creates a sludge on the bottom of the brine tank. Humidity is one of the leading causes of systems not working, so keep an eye on your salt to ensure the system does not have any issues.

How Does a No Salt Water Conditioner Work?

There are many Salt free systems that DO NOT WORK! Unlike salt-based softeners which use ion exchange to remove hard water minerals from water, Our salt free water Conditioner systems uses a Food Grade Phosphate that is (FDA NSF approved) used to coat the minerals and keep them in suspension so the minerals do not stick to the Appliances, pipes and faucets in your home. The benefit with our Aqua OTTER Salt free Conditioner is keeping the beneficial minerals in the water for a healthy great tasting water. Our systems are very low maintenance, no buying or packing salt. Perfect for our customers that do not like the soft slimy feel and does a sufficient job for protecting your home. It is far superior than any other No-Salt System in the industry. The Alpha 3000/4000 is an all in one conditioner.

Phosphates have many uses in the treatment of potable (drinking) water. They are used to prevent "red" (from iron) and "black" (from manganese) water; to prevent and/or retard scale formation (from minerals depositing) and corrosion (from low pH and/or dissimilar metals) in the water distribution system; and to reduce soluble lead and copper in potable water delivered to the consumer's tap. Experience has shown that polyphosphates not only inhibit scale formation, but they can also help remove existing hard deposited carbonate or sulfate scale. Pipelines carrying potable water treated with polyphosphate for extended periods of time (several months) first show a gradual softening of the scale followed by disintegration and removal. The soft scale particles are deflocculated by the polyphosphate and carried away resulting in a clean piping system.. . Salt-free softeners are also known as water conditioners because they do not actually “soften” the water; They condition (or neutralize) it. And because these types of systems do not trap any materials, there’s no need for a cleaning cycle to remove captured ions.

On average, a salt-free water conditioner is usually less expensive than a salt-based one and is very easy to install – once you have the right equipment. Also, this type of system requires less maintenance since no electricity is needed to run the cleaning cycle and no water is wasted when purging the minerals from the resin bed. And as easy as that, you can save on your water and electricity bills. If you’re health-conscious (as you should be), you’ll appreciate the fact that no added salts are used in the softening process.

However, a major drawback of using a salt-free softener is that it may not work effectively when exposed to other contaminants like lead and chlorine. That’s why we urge customers to have some sort of filtration in front of the system so the media does not foul up. But if you do not want to deal with salts/chemicals, then salt-free softeners are the way to go.

What Maintenance is Involved in Salt Free Water Conditioners?

Once you’ve installed your salt free water softener, the only maintenance involved is changing the cartridge as needed.

What Size Water Softener Do I Need?

Size is one of the most important factors to consider when deciding on your ideal water softening system. A salt based unit that is too small will likely lead to a limited supply of softened water in your household and low water pressure. In the same way, one that is too large or bulky can cause some serious sanitary issues.

Household water softeners are usually rated by the number of hardness grains they can remove and their salt efficiency (the amount of salt they require for regeneration). Many people think that it’s the physical size of the water softener that matters, but it is the softening capacity of the system that truly determines its suitability for your home.

So how do you know what size softener you need? Let’s look at several key factors to help you find your best match.

1. How Hard is Your Water Supply?

Our Salt free water conditioner is not suitable in all homes. It is determined by the hardness of the water. We would encourage a consumer to have their water tested before making a choice.

Water hardness is simply a measure of how much calcium and magnesium is dissolved in your water supply. To determine the level of hardness in your tap water, you can perform a water test and obtain the results in mg/L (milligrams per Liter) or GPG (grains per gallon). If your water comes from a well, river or any other groundwater source, you can either purchase a water quality test kit and check for hardness at home or send a water sample to a lab to be tested. The water hardness is often displayed in mg/L instead of GPG on some test kits, but you can simply divide the mg/L result by 17.1 to get your GPG value.

If you happen to be on a public line, you can check your annual water quality report online to see if any hardness was reported by your local water authorities.

If you plan on purchasing a salt based water softener, it is crucial to know your water hardness when before purchasing a softener. Guessing at this number can result in an improperly sized water softener – and a string of migraines. When it’s time to program your system, it will ask for the hardness value. You might need to increase your grain hardness rating to compensate for any iron in your water. In this case, add 3-5 GPG of hardness for every 1.0 mg/L of iron to better determine your size water softener from there.

2. What is Your Average Daily Household Water Usage?

This is Important To Know For Salt Systems. How much water does your household use daily? Do you take long showers? How often do you use the dishwasher and washing machine?

An easy way to determine how much water is used in your household every day is to look at your monthly water bills. To figure out your average monthly usage, add the total consumption from your last three bills and divide that number by 3. Next, divide the average monthly usage by 4, then by 7 to get your average daily usage.

Here’s a scenario:

Say your total consumption (in gallons) for each month were 10,000 gallons, 15,000 gallons, and 20,000 gallons, respectively.

· Total usage for last 3 months: 10,000 + 15,000 + 20,000 = 45,000 gallons

· Average monthly usage: 45,000/3 = 15,000 gallons

· Average weekly usage: 15,000/4 = 3,750 gallons

· Average daily usage: 3,750/7 = 535 gallons

If math is not your best friend or you don’t have your water bills handy, just assume that each person in your home uses 75 gallons per day. So, if 4 family members are living in your household, you can use 300 gallons per day as a fair guesstimate.

Calculate Your Daily Softening Requirement

Now, it’s time to determine the amount of softened water your home will require each day. To achieve this, multiply your daily water use by your water hardness level (corrected for iron).

Here’s an example:

· Hardness: 10 GPG

· Daily Water Consumption: 4 people x 75 gallons per day = 300 gallons per day

· Daily Softening Requirement: 10 GPG x 300 gallons per day = 3,000 grains per day.

Based on the example above, the water softener will be removing 3000 grains per day.

Salt Based Water Softener Regeneration Frequency

At this point, you’ve already used your daily water usage to figure out how much softening is required per day. Great! But there’s one more important factor to consider.

Water softeners are usually sized so that they generate about once per week. One regeneration cycle per week helps to keep your water consumption low and cleans out the resin bed so it can continue to produce quality water. Therefore, you must purchase a good-sized water softener to avoid regenerating too often and increasing water consumption, or not regenerating enough and the system starts to wear down.

If we take the daily softening requirement of 3000 grains per day and multiply it by 7, you would need a system that can soften 21,000 grains of total hardness to regenerate once every week.

When looking at different softeners, you’ll see listing for the size (in cubic feet) of the resin block and/or maximum grain count per regeneration cycle. Some water softeners have 24,000, 32,000, 48,000 and 64,000 grain capacities. But please be aware that while a 24,000-grain system (like the one in the example above) would seem ideal at first, we’re looking for 24,000 grains of total softening capacity.

What many resellers won’t tell you is that the 24,000-grain system will take about 27 pounds of salt to fully regenerate the system to the 24,000-grain level. A more accurate description of the “24,000” system would be “0.75 cubic feet”. “24,000” is the number of resins in the system. While you can get 24,000 grains of capacity from that amount of resins, it will use an excessive amount of salt to achieve this.

Let’s say your home’s weekly softening requirement is 30,000 grains. A system with one cubic foot of resin has a maximum grain setting of 32,000, which would probably burn through the softener salt to keep the system going. Instead, you should opt for a softener with 1.5 cubic feet of resin and a maximum grain setting of 48,000. By using a lower grain setting than the system can produce, it will use less salt in the long run.

How to Install a Water Softener

Now that you’ve figured out the proper size of your desired system and made the purchase, it’s time to start setting things up. For the best installation option, you can consider doing it yourself or hiring a professional plumber for a completely hands-off experience (and everything in between).

Installing the system by yourself is pretty simple – as long as you have the right knowledge and the correct tools for the job

If you’re willing to take on the task, here are some basic steps to follow:

1. Select a suitable location to install the water softener

First and foremost, you need to decide where you want to install your water softener. In most cases, the best places are the basement or the garage, or an indoor location that is closest to where the water enters your house. Ideally, the system needs to be positioned so that the softened water enters your home and not through outside hose connections or pipes. The unit should also be placed near a power source, a supply inlet and a drain for water discharge. And don’t forget to clear and sweep the area to get rid of any dust and debris present.

If you choose to install the system in an outdoor location, you must take the necessary steps to ensure that the softener, plumbing, and wiring are protected from the elements, direct sunlight, contamination, vandalism, exposure to moisture, insects, and so on. Also, you might need to secure the system with an earthquake strap, especially if you live in an area that is prone to earthquakes and tremors.

2. Turn off the main water supply and electric water heater

Shutting off the main water supply prevents any possible leaks or damages to your pipes and plumbing fixtures. And if you have an electric water heater, turn it off to avoid potential damages.

3. Drain water from all involved lines

Next, turn on nearby faucets and other outlets to drain away all the remaining water. As simple as it sounds, this precaution can prevent damage to the system, should anything go wrong during the installation.

4. Install the bypass valve onto the water softener

Most water softeners come with a bypass valve that allows you to turn off the water intake in case you need to service the system or redirect the water flow without cutting off the supply to your entire house in the process. To install it, push the bypass valve in the softener valve as far as possible and use the holding clips provided to snap it into place. If your model does not come with a bypass valve, we suggest that you add one to your setup.

5. Connect inlet/outlet ports

Connect the incoming and outgoing pipe connections to the system’s inlet and outlet ports, respectively. The ports are usually labeled. You must get the flow direction right or else your softener won’t be able to provide any softened water to your home. So, make sure to double-check your pipe connections.

6. Set up drainage connection if using a salt based softener

Every water softener needs a place to drain water during the regeneration cycle. The drain options include a floor drain, a standpipe, or a utility sink. Connect the small drain tubing to the water softener’s drain fitting, then connect the overflow drain hose to the drain elbow on the salt tank. Make sure that both of these hoses are positioned to direct the water to the drain. They also require an air gap and cannot just be pushed into any drain pipe. Next, anchor the drain hoses so they are above the drain standpipe.

7. Add salt to the brine tank

Fill the brine tank with salt. Check your manufacturer’s manual to determine what type of salt to use and the suggested amount.

8. Turn on the water supply back on and partially open the bypass valve

As soon as you turn on the main water supply, slowly open the bypass valve to let water flow into the resin tank. Sudden pressure can damage fittings, so be careful not to open it too quickly. Air will pass through the drain line for a few seconds, so once it stops, you can fully open the valve. Afterward, turn your electric water heater back on.

9. Plug in and regenerate

Plug in your new water softener. Once it boots up, press the “Regenerate” button and allow the unit to start a full regeneration cycle.

10. Configure the system

When the service screen re-appears, follow the start-up steps provided by your manufacturer to configure the system. The configuration settings may include your water hardness level, the time of day, how often you want the system to regenerate, and others.

How to Clean a Salt-Based Water Softener

Maintaining your water softener goes way beyond adding salt to the brine tank. Standard water softeners need to be cleaned once per year to every five years, depending on several things. However, if you notice that your water has turned hard all of a sudden or the water is discolored or smells funny, you shouldn’t wait for more than a few days to clean the entire system.

Here’s how to clean the brine tank in a salt-based water softener:

1. Empty the brine tank

The best time to clean the brine tank is when it’s extremely low on salt. This way, you won’t have to scoop it all out by hand, and the tank is lightweight enough for you to move it around quite easily. If the tank is not already empty, use the bypass valve to shut off the water intake, then dump all of the water and the salt out of the tank. Be careful not to dump the waste in your garden as the salt can destroy plants. If there are any blocks or bridges of salt left in the tank, pour some hot water inside it to dissolve them.

2. Remove the brine/salt grid at the bottom of the brine tank

Some salt-based water softeners have a mesh platform at the bottom of the brine tank. Remove it and set it as before cleaning.

3. Clean inside with clean, soapy water

For the actual cleaning, mix about two gallons of water with a generous amount of dish washing soap. Pour the entire mixture into the tank and scrub the entire interior thoroughly with a long-handled brush.

4. Dump the soapy water and rinse the tank

Next, dump the soapy water and rinse the tank with clean, pure water.

5. Rinse the tank again with bleach

Pour about a ¼ cup of unscented household bleach and two or three gallons of water into the tank. Stir the bleach solution and let it sit for about 15 minutes to sanitize the tank. The bleach is effective for killing bacteria and other harmful microorganisms.

6. Rinse the tank again and refill it

Once more, rinse the tank thoroughly with clean water to wash away the bleach solution. Put back the salt grid in the tank (if there was one), and replenish the tank with water and salt. Wait for at least a few hours before regenerating the tank to let the salt dissolve completely.

7. Flush with water softener cleaner (additional cleaning)

There are several brands of water softener cleaners that can help keep your system in tip-top shape for longer. Pour a good quality water softener cleaner into the brine tank once every few months. Make sure to follow the instructions on the label. Manually start a regeneration process or pour the cleaner moments before a scheduled regeneration. This step helps keep the resin efficient and functional. If your water contains a high amount of iron or any other chemicals or agents that can hinder the efficiency of your softener, use a powerful cleaning product or buy an attachment that automatically adds a small amount of the cleaner each time the system regenerates.

8. Clean the valve between the brine tank and the resin tank

Water softeners often come with a nozzle and venturi valve. Both are responsible for drawing brine into the resin bed during the regeneration cycle. If they become clogged with silt or dirt, the water softener eventually stops working. To prevent that from ever happening, disassemble and clean these parts about twice a year, or whenever the brine tank gets clogged. Follow the instructions in your manual to avoid possible damages to the system or injury to yourself.

What Kind of Salt Does My Salt-Based Water Softener Use?

Adding the right type of salt (and the correct amount) to your brink tank is crucial for keeping your water softener running at its peak performance. The issue is, there are many different types of water softener salts on the market, which could make it difficult to find the right type for your system. Fortunately, there is a consensus as to what type of salts should be used in a salt-based water softener.

Salt-based softeners are designed to use one of the two main classes of softener salt, depending on whether sodium ions or potassium ions are used in the ion exchange process. These include:

1. Sodium Chloride (Salt)

Sodium chloride is a naturally occurring mineral found in the earth. It is the most commonly used salt in water softener brine tanks. There are three different forms of sodium chloride, namely: salt pellets, salt crystals, and block salt.

Let’s look at each type in more detail.

Salt Crystals:

Salt crystals include rock salt and solar salt. Rock salt looks similar to tiny rocks or pebbles, and are mined underground. It forms when salt deposits build up. Because rock salt contains an excessive amount of calcium sulfate, it might not dissolve well in water and may cause some maintenance issues.

Solar salt, otherwise known as ‘sea salt’, is produced when the sun dries up saline water (water that contains a high concentration of dissolved salts). It is said to be 99.6% pure and highly soluble. That simply means that solar salt dissolves in water very quickly, and thus, can help extend the life of your water softener and reduce the need for frequent maintenance.

Evaporated Salt Pellets:

Evaporated salt pellets are said to be the purest form of sodium-based salts for softening water. But there’s a catch. While evaporated salt pellets are highly effective at treating hard water, they are normally expensive.

Block Salt:

We don’t recommend this type of salt for use in water softeners. In many cases, some sellers will add certain bonding agents to hold the blocks of salt together, which just adds more impurities to the salt – and your water.

2. Potassium Chloride

If you do not wish to use sodium chloride in your water softener, you can use potassium chloride instead. For one, it is 99.9% sodium-free and is great for people who want to cut back on salt. However, it is not good for people with hypertension and some other medical complications. Besides, potassium chloride pellets can be difficult to find and can be very expensive.

Overall, evaporated salt pellets are our best pick for a salt-based water softener.

Verdict

In terms of overall water “softening”, you’ll probably be happier with a salt-based system if you prefer a soft, slippery feel to the water. Or if you are concerned about wasting water and adding salt back into the environment than a salt free system is the choice. Both types of systems are designed to combat the negative effects of hard water. If you are more concerned with price, a salt-free system may work for you, if you find you can’t live without that soft, slippery feel to the water then maybe a salt based system is the answer. At the end of the day either system will eliminate the negative effects of hard water it is just preference on which technology you decide to go with.